Steps to flash Nokia Mobiles:
Note: The technique to flash custom firmware in this article is not
exclusively limited for Nokia 5800XM only. In fact, most Nokia phone can
be flashed up with custom firmware using the method that I will discuss
below. However, due to my limited experience with other Nokia model, it
is safe to set the title as above.
1)Install Nokia Ovi Suite & Backup Your Phone:
Install
Nokia Ovi Suite and back up your phone especially your contacts,
message etc. In fact, just backup everything because prior to flashing
your phone, we need to hard reset it and format your phone memory card
to avoid any potential error later on. Hard reset will erase all your
contacts, message, phone setting etc. So back them up using Nokia Ovi
Suite.
Even if you don’t want to back up your phone, it is essential
to install Nokia Ovi Suite for the driver purpose. Otherwise, JAF tool
can’t see your mobile phone at later stage.
2)Return Your Phone Software to Its Original State
Format
your phone memory card. You can do this using your phone or using a
memory card reader. I personally prefer to format my memory card using
my own phone. Go to : File Manager / E: Memory Card / Click on Options
button / Memory card option / Format.
Next, hard reset your phone.
You may achieve this using 2 methods: The first one is type *#7370# (the
default security code is 12345) but I prefer the below method (bypass
security code):
Turn the phone off
Press and hold 3 keys (green + red + camera) together.
Without releasing these keys, turn the phone on.
Keep holding these 3 keys until the screen show Nokia’s standard hand shake animation.
Release these 3 keys. Your phone will execute hard reset process.
Okay, now your phone software is good as new.
3)Download Your Phone Original Firmware
Now
we need to download your phone’s original firmware using NAVIFIRM.
Originally, we flash our phone using Ovi Suite or PC Suite right. This
suite automatically detects our phone hardware and software then
downloads and installs the relevant firmware for our phone
automagically. However, for this one we need to manually select and
download the right firmware for our phone.
Extract and run NAVIFIRM. Mine is as shown below.

Choose
your phone model correctly. As we can see here, there are 3 variant of
Nokia 5800XM. The RM-356, RM-427 and RM-428. Different model number use
different kind of hardware. So, do not download firmware for RM-427 or
RM-428 if your phone model is RM-356. You can check your phone model by
typing *#0000#. Look for Type.
‘Release’s is firmware version. Ensure
that the firmware you are going to flash into your phone (the one you
are about to download using NAVIFIRM now) is newer (or at least has same
version number) than the one that already in your phone. Downgrading
firmware will definitely brick your phone. You may check with your phone
firmware by typing *#0000# too. As for my case, my current phone
firmware is 51.0.6. So, I have to download ‘releases’ version 51.0.6 or
later (in this case, 51.0.6 is the latest one).
Next, choose your
phone variant. My Nokia 5800XM is for Malaysian market and has ‘red
lining’. Therefore I chose“APAC1 RED MALAYSIA (0570196)”. If you are not
from Malaysia, for example Indonesia and your phone has blue lining,
you may want to choose “APAC1 Indonesia BLUE (0559960)” variant.
Finally
for the files section. Just tick them all. And press “Download from
FiRe” button. Save the files into “Your phone model number” folder. As
for my case, I save them into a folder name RM-356 on my Desktop.
4)Download the Custom Firmware
There
are so many CFWs for Nokia 5800XM out there. To say CFW A is better
than CFW B and vice versa is not entirely correct. Different CFW has
different goal. Some CFW is more features and function oriented thus
this firmware is kinda bloated for some perspective. Some CFW is more
speed and performance oriented. So this firmware may be seem too bare
for somebody else. In fact, some firmware might be tweaked to the
extreme where battery life is no longer a primary concern. Therefore, it
is up to you to choose the right firmware for your mobile phone.
If u need you can request by comment i shall update it.
5)Mix Up Custom Firmware with Original Firmware
Custom
Firmware doesn’t provide every single file that is needed for your
phone. That is why we need to download original firmware using NAVIFIRM
before. Same goes to Xtension^10 variant-2. It just provides Rofs2 and
Rofs3 files only. So, extract the “ENGLISH ONLY Xtension
(rofs2+uda).rar” and “Xtension_10v2.rofs3.rar” into a folder as below.

Then,
open up the original firmware folder (the RM-356). Most likely, the
files will look like the screenshot below but this is not a must.
Different firmware version for different phone model may have different
file names.

What
we need to do now is change the CFW files name (from Extracted folder)
according to your original firmware files name (from RM-356 folder). So
as for my case, I need to change “General.uda.fpsx” to be
“RM-356_51.0.006_026_000_U01.uda.fpsx”. Err..how do I know? Well, in
RM-356 folder, there is only 1 file that end with .uda.fpsx right. In
short, the files that I change is as listed below:
General.uda.fpsx===> RM-356_51.0.006_026_000_U01.uda.fpsx
ENGLISHONLY.rofs2.V01 ===> RM-356_51.0.006_prd.rofs2.V22
Wave1.Xtension^10v2.rofs3.fpsx ===> RM-356_51.0.006_C01_prd.rofs3.fpsx
The
next step is, copy these three files that we already change its name
into RM-356 folder (folder that contains original firmware files) and
overwrite the original files. The idea is, we want to mix up original
firmware’s files with custom firmware’s files. The reason is, custom
firmware doesn’t provide every single file that is needed for your phone
operating system. The author only supplies 2 or 3 files that he/she
modifies. So it is up to us to prepare the additional files that are
needed by our phone. That explain why we need to download the original
firmware using NAVIFIRM previously.
So, once the 3 original files are
overwrote by the custom firmware’s files (that we already change their
name), our complete CFW is ready to be transferred into your Nokia
5800XM. Copy the whole folder (RM-356) into “C:\Program
Files\Nokia\Pheonix\Products” directory. Or if you are using 64 bit
operating system, copy the whole (RM-356) folder into “C:\Program Files
(x86)\Nokia\phoenix\products”. Refer screenshot below (omit the
RM356-0570196… folder, it was automatically created by JAF when I did
flash my phone previously).

Please
note that the folder (that store our complete CFW) in
“phoenix\products\”needs to be named exactly as your phone’s model
number. As for my case, my 5800XM’s model number is RM-356. That
explains why I use folder nameRM-356.
And for those who are already
panic because they can’t find any phoenix folder in Nokia
directory…don’t be. By default, there is none. I manually create the
“phoenix” folder and “product” folder.
6)Preparing JAF Tools
JAF
Tools is the software that we will use to transfer your complete CFW
into your mobile phone. So, follow the steps below to prepare it. It
consist of JAF installation and copy paste 2 files (ini file and PKEY
emulator) into JAF installed directory.
Extract “Nokia Flash
Tools.rar” (the one you download for JAF and PKey). You will find
“JAFSetup_198.62.rar” file, “OGM_JAF_PKEY_Emulator_v 5.rar” and “(.INI
FILE)(jaf_nok4models).rar” file. Extract all the 3 files.

Install “JAFSetup_1.98.62.exe” at its default location.
Copy
“Jaf_nok4models.ini” and “OGM_JAF_PKEY_Emulator_v 5.exe” into
“C:\Program Files\ODEON\JAF” or “C:\Program Files (x86)\ODEON\JAF” if
you are using 64 bit operating system.

Then, make a shortcut for “OGM_JAF_PKEY_Emulator_v 5.exe” emulator to your desktop for easy access later on.
7)Transferring Complete CFW into your 5800XM phone.
If
you happen to use Windows Vista or Windows 7 (32 bit or 64bit), you
have to change JAF PKey Emulator’s compatibility first. Right click on
the JAF Pkey Emulator and choose properties. Click on Compatibility tab
and set compatibility mode to Windows XP (Service Pack 3) and set
privilege level as Run this program as an administrator as shown in the
screenshot below:

Run the JAF Pkey Tool from your desktop.

Ensure the setting as in the screenshot above. Then click GO.
An error box will appear. Don’t worry, just click OK button.

Then, JAF will start. Click on BB5 tab.

Ensure that Manual Flash, Dead USB, Normal Mode and Use INI are checked. Uncheck CRT 308.

Then select your phone model. As for my case, I have to choose RM-356 as expected. Next, click OK.
If you do everything correctly, your JAF will look like as the screenshot below.

All four green circles will light up (MCU, PPM, CNT, APE Variant).
And ensure the path for the firmware (as in the marked red square) is right.
Next,
TURN OFF your phone and connect it to the computer USB. (It is
recommended to shutdown OVI Suite completely. Right click OVI Suite icon
in the tray (if you happen to run it before) and choose exit).
Click on FLASH button.
A warning dialog box will appear, click YES.

Then,
press your phone’s “Power Button” for 1 second and release. Just 1
second. Not more. Else your phone will start up. WE DON’T WANT your
phone to start up. We just want to allow JAF detect our phone.
Once the JAF could detect our phone, the flash job will start.
Note: Whenever JAF need to detect the phone, press your phone’s power button for 1 second.
Wait for a minute or two until the flashing process is totally completed (indicated by a series of ‘ting’ sound).

 NOW ENJOY UR PHONE WITH NEW FIRMWARE
If any one need the custom frimware for Nokia Bellee OS for Nokia 5800 RM-356 comment below...
NOW ENJOY UR PHONE WITH NEW FIRMWARE
If any one need the custom frimware for Nokia Bellee OS for Nokia 5800 RM-356 comment below...


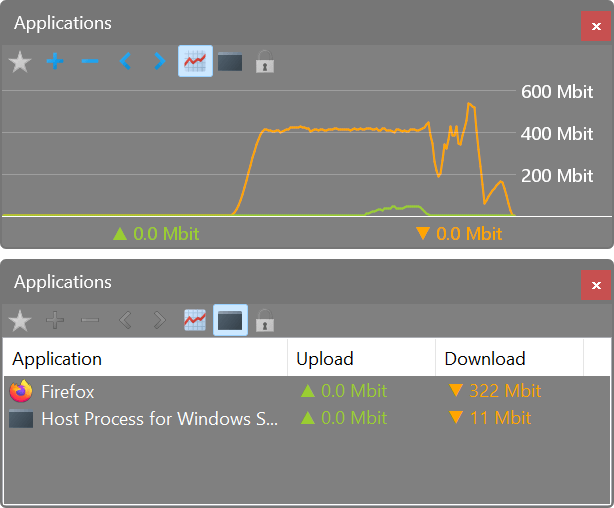
 NetWorx
is a simple and free, yet powerful tool that helps you objectively
evaluate your bandwidth situation. You can use it to collect bandwidth
usage data and measure the speed of your Internet or any other network
connection. NetWorx can help you identify possible sources of network
problems, ensure that you do not exceed the bandwidth limits specified
by your ISP, or track down suspicious network activity characteristic of
Trojan horses and hacker attacks.
NetWorx
is a simple and free, yet powerful tool that helps you objectively
evaluate your bandwidth situation. You can use it to collect bandwidth
usage data and measure the speed of your Internet or any other network
connection. NetWorx can help you identify possible sources of network
problems, ensure that you do not exceed the bandwidth limits specified
by your ISP, or track down suspicious network activity characteristic of
Trojan horses and hacker attacks.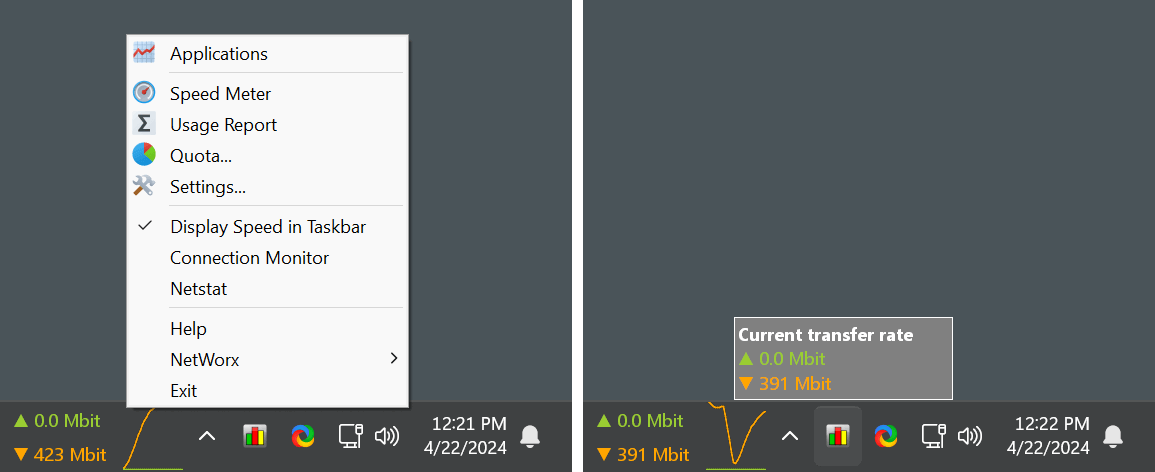


